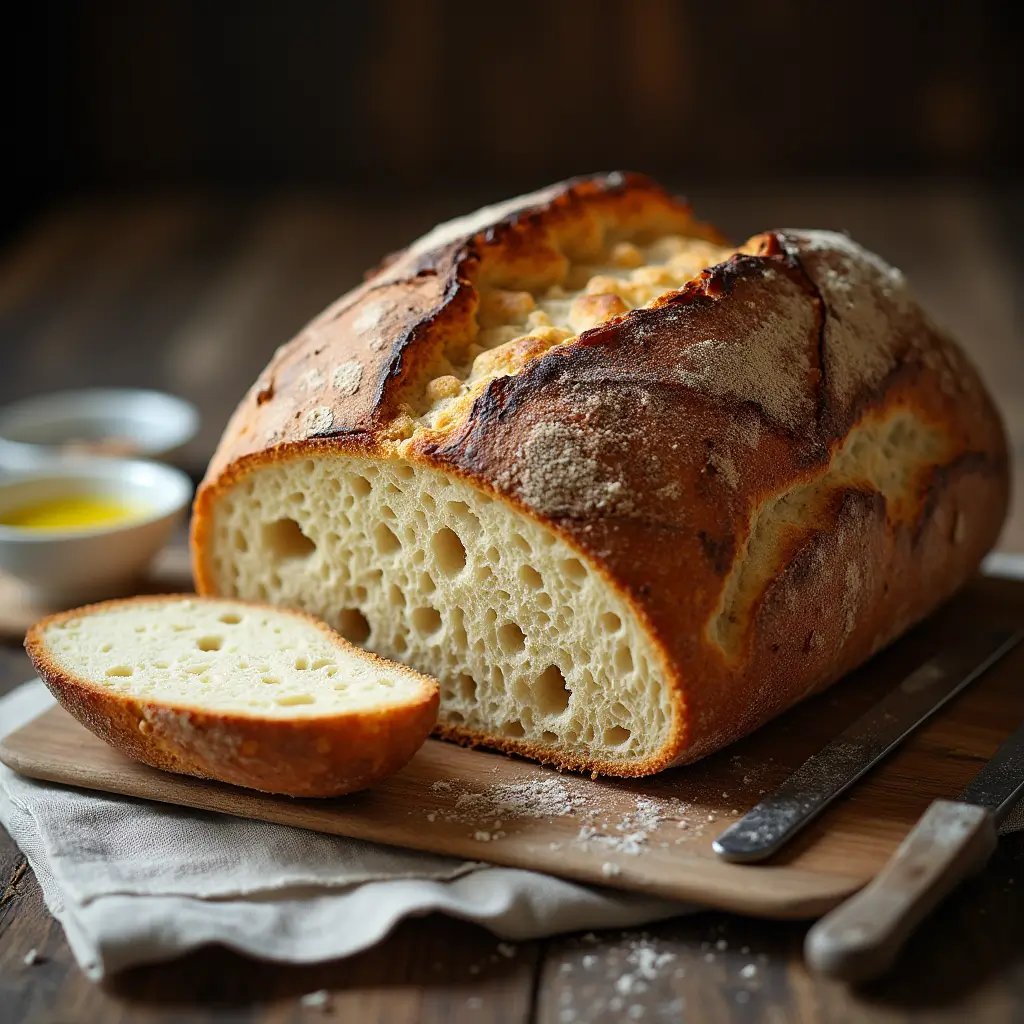
There’s something magical about the process of creating sourdough bread. That distinctive tangy flavor, the satisfying chew, and those beautiful air pockets that can only come from a properly fermented dough. But for many home bakers, the first step—creating a sourdough starter from scratch—feels like an intimidating science experiment.
I understand the confusion. With so many conflicting methods online and terms like “hydration” and “discard” being thrown around, it’s easy to feel overwhelmed before you’ve even begun. The good news? Making a sourdough starter is much simpler than it seems, and I’m here to guide you through every step of the process.
This comprehensive guide breaks down the science into simple terms and provides day-by-day instructions to help you create a thriving sourdough starter from scratch. With a little patience and observation, you’ll soon have a bubbly, active culture ready to transform ordinary flour into extraordinary bread.
Table of Contents
What Exactly Is a Sourdough Starter?
At its core, a sourdough starter is a living culture of wild yeast and beneficial bacteria that works all together to leaven and flavor your bread. Unlike commercial bread which relies on store-bought yeast packets, sourdough harnesses the natural microorganisms already present in your environment.
These microscopic helpers come primarily from:
- The flour itself (especially whole grain flours)
- The air in your kitchen
- Your hands and environment
When you mix flour and water and give it time, you create the perfect habitat for these wild yeasts and bacteria to thrive. The yeast produces carbon dioxide gas—creating those lovely bubbles that make your bread rise—while the bacteria (primarily lactobacilli) produce acids that give sourdough its characteristic tangy flavor and help preserve the bread naturally.
This symbiotic community of microorganisms is what makes sourdough special. It’s also why every sourdough starter has a unique character influenced by your local environment, the flours you use, and your specific care routine.
Essential Ingredients & Equipment You’ll Need
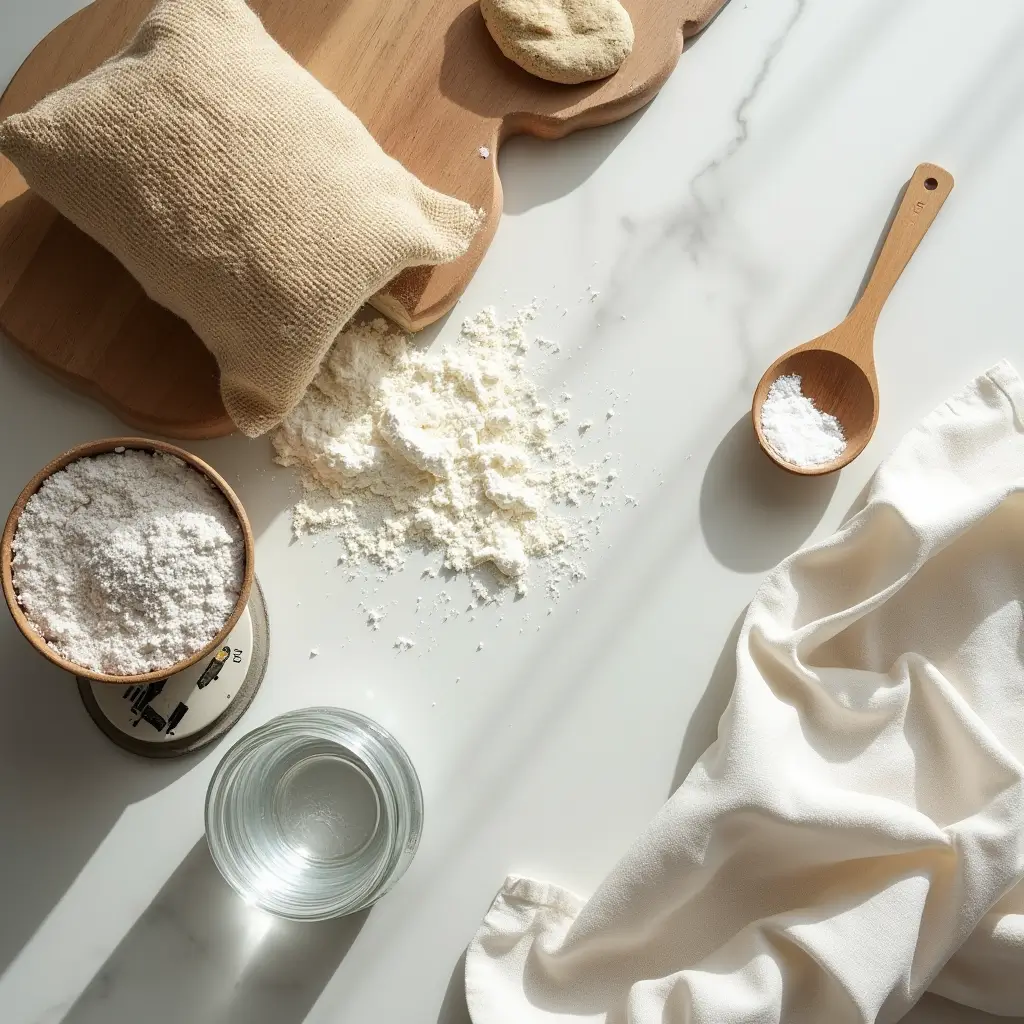
Ingredients:
Flour: You’ll need two types for the best results:
- Unbleached All-Purpose Flour: This will be your main flour both for creating and maintaining your starter.
- Whole Wheat or Rye Flour: These whole grain flours contain more nutrients, minerals, and wild yeast cells to jump-start fermentation. Think of them as a power boost for your new starter.
Quality matters! Your starter will only be as good as the ingredients you use. If possible, choose freshly milled or high-quality flour brands.
Water: Chlorine can inhibit the growth of beneficial microbes, so opt for:
- Filtered water
- Bottled spring water
- Tap water that has been left out overnight (allowing chlorine to dissipate)
The ideal temperature is lukewarm (around 75-80°F or 24-27°C), which helps encourage microbial growth.
What you DON’T need: Commercial yeast, pineapple juice, grapes, or other additions. While these can be used in some methods, our approach relies solely on the natural microorganisms already present in flour and your environment.
Equipment:
| Equipment | Recommended Size/Type | Why It’s Important |
|---|---|---|
| Glass Jar | 1-quart/liter capacity with wide mouth | Allows you to see activity clearly and provides room for growth |
| Kitchen Scale | Digital with gram measurements | Essential for consistency and success – volume measurements are unreliable |
| Spatula or Spoon | Silicone preferred | For thorough mixing without leaving residue |
| Loose Cover | Cheesecloth, paper towel, or loose-fitting lid | Allows air exchange while keeping contaminants out |
Pro tip: Having two glass jars makes the feeding process much cleaner and easier—you can transfer your starter to a fresh jar while washing the other one.
Creating Your Sourdough Starter: Day-by-Day Instructions (Days 1-7+)
Day 1: The Initial Mix
Today, we’re creating the environment where wild yeast and beneficial bacteria can begin to thrive.
Ingredients:
- 50g whole wheat or rye flour
- 50g unbleached all-purpose flour
- 100g filtered water at room temperature
Steps:
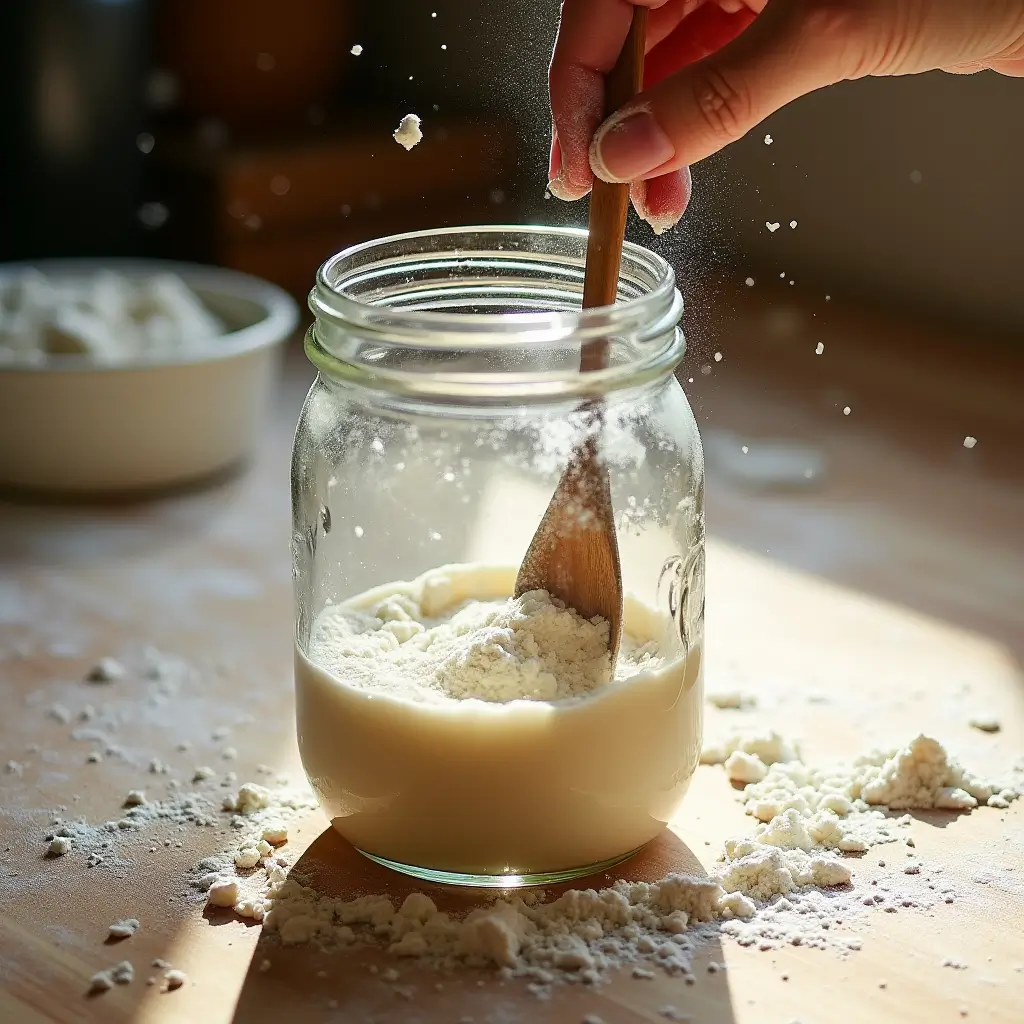
- Weigh your jar empty and note this weight (or tare the scale with the jar on it).
- Mix the flours together in your glass jar.
- Add the water and stir thoroughly until no dry flour remains and the consistency should be like a thick pancake batter.
- Mark the level on the jar with a marker or piece of tape.
- Cover loosely with a breathable lid or cver.
- Place in a warm spot in your kitchen (70-80°F/21-27°C is ideal) away from direct sunlight and drafts.
What to expect: Not much happens on day one. You might see a few tiny bubbles, and it will smell like wet flour. Don’t worry if there’s no activity yet—the microbes are just getting settled.
Day 2: Observation & First Feed
Check for activity:
- Look for small bubbles on the surface or sides
- The mixture might have a slightly sour or yogurt-like smell
- It may have risen slightly above your marked line
If you see minimal or no activity: Simply stir the mixture well and wait another 24 hours before checking again.
If you see definite bubbles or rise: It’s time for your first feeding!
First Feeding Steps:
- Discard most of your starter, and leave only 50g in the jar.
- Add 50g of all-purpose flour.
- Add 50g of filtered room temperature water.
- Mix thoroughly until smooth.
- Mark the level again.
- Cover loosely and return to your warm spot.
Why discard? Discarding allows you to refresh the food source without creating massive amounts of starter. Don’t worry—we’ll discuss ways to use this “sourdough discard” later!
Day 3-6: Establishing Routine & Observing Changes
For the next several days, you’ll follow the same basic process:
Daily Feeding Routine:
- Observe your starter first—note any bubbles, rise, and smells.
- Discard all but 50g of starter.
- Feed with 50g all-purpose flour and 50g water (1:1:1 ratio).
- Mix thoroughly, mark the level, cover, and return to your warm spot.
What to expect during these days:
- Initial burst of activity: Days 2-3 might show exciting bubbling due to less desirable bacteria (often leuconostoc) that work quickly but fade as the environment acidifies. This can produce strange smells (like nail polish remover or feet). This is normal!
- The “lull” phase: Around day 4-5, activity might decrease as the microbial community shifts. Many beginners give up here thinking they’ve failed, but patience is key! Keep feeding consistently.
- Increasing predictability: By days 5-6, you should start seeing a more predictable pattern of rising after feeding and falling as the microbes consume the available food.
- Evolving aroma: The smell will transform from potentially funky/sour to a pleasantly tangy, slightly sweet, yogurt-like or fruity aroma.
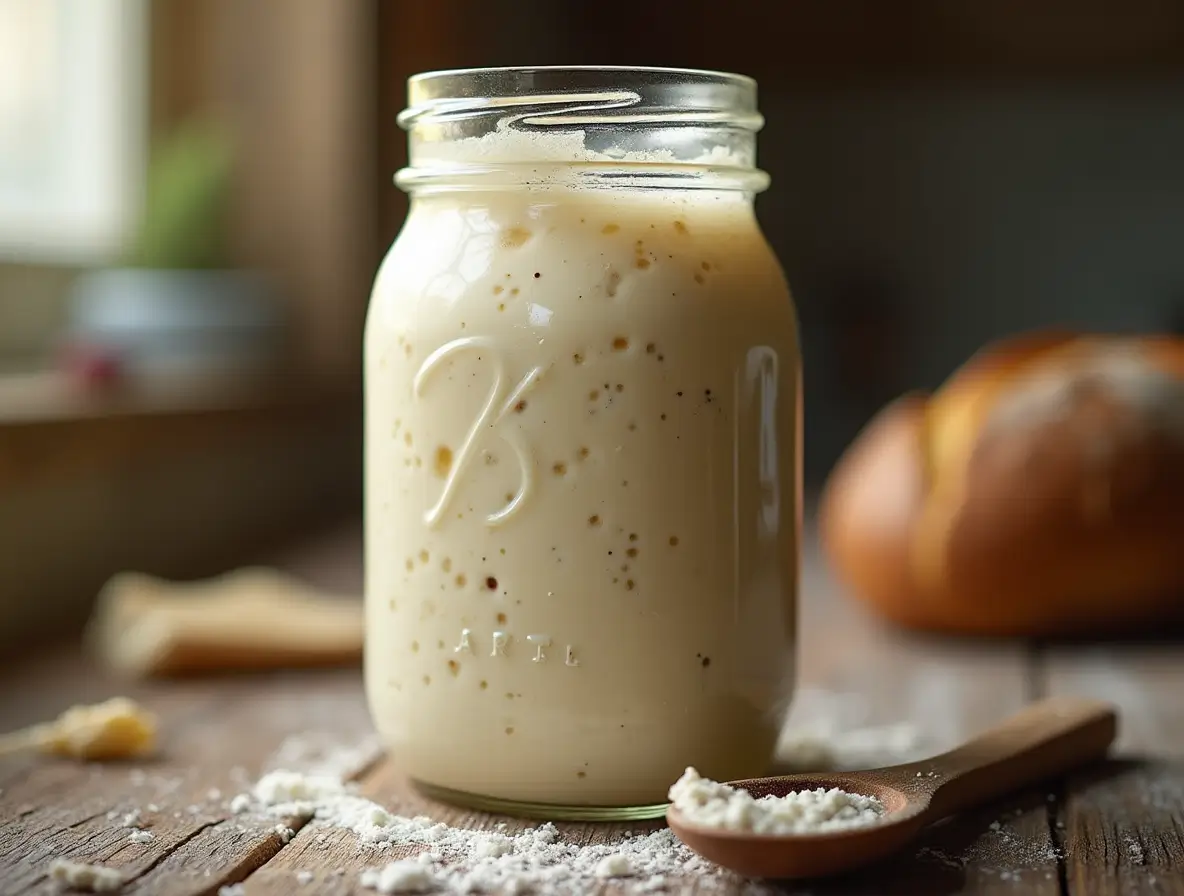
Day 7 (and beyond): Signs of Maturity & Readiness
A mature sourdough starter ready for baking will show these signs:
- Predictable rise and fall: It should roughly double in volume within 4-8 hours after feeding
- Consistent bubbling: Both on the surface and throughout the starter
- Pleasant aroma: Tangy, yeasty, and slightly sweet—no harsh vinegar or acetone smells
- Texture changes: When stirred, it may have a slightly stretchy or web-like appearance
- Passes the float test: A small spoonful gently dropped in water floats (indicating good gas retention)
The float test: You can take a tiny amount of starter at its peak activity and gently drop it in a glass of water. If it floats, it’s likely ready for baking. However, this isn’t foolproof—use it alongside other observations.
Important reassurance: Don’t be discouraged if your starter isn’t fully mature by day 7! Depending on your environment, flour quality, and temperature, it might take up to 2-3 weeks to develop fully. Consistency is more important than speed.
Maintaining Your Active Starter: Regular Feeding Schedules
Once your sourdough starter is mature, you have options for maintenance based on your baking frequency.
Room Temperature Maintenance (For Frequent Bakers)
If you bake several times per week, keeping your starter at room temperature makes sense:
Feeding frequency options:
- Once daily: Feed using a 1:1:1 ratio (starter:flour:water) by weight
- Twice daily: If your kitchen is warm or you prefer a milder flavor, feed morning and evening using a 1:2:2 or 1:3:3 ratio (higher flour/water proportions help the starter last longer between feedings)
How ratio affects your starter:
- Lower ratios (1:1:1) = Faster fermentation, stronger sour flavor
- Higher ratios (1:3:3) = Slower fermentation, milder flavor, longer time between feedings
Refrigerator Storage (For Occasional Bakers)
If you bake less frequently, refrigeration slows fermentation dramatically:
- Feed your starter normally with a slightly higher flour ratio (like 1:2:2)
- Let it rise at room temperature for 1-2 hours
- Place in refrigerator with a loose-fitting lid
- Feed once weekly to maintain viability
Reviving for baking:
- Remove from refrigerator 24-48 hours before baking
- Feed once or twice at room temperature
- Wait until it shows peak activity before using in your recipe
Sourdough Discard: Don’t Waste It!
Each time you feed your starter, you remove a portion—this is your sourdough discard. While not active enough to leaven bread on its own, this tangy mixture is perfect for countless recipes!
Popular sourdough discard uses:
- Pancakes and waffles
- Crackers and flatbreads
- Quick breads
- Muffins and scones
- Pizza crusts
- Cookies and brownies
The discard adds complex flavor and improved texture to many baked goods while reducing food waste. Consider it a bonus ingredient rather than something to throw away!
Troubleshooting Common Sourdough Starter Problems (Your FAQ)
Why isn’t my starter bubbling?
Several factors could be affecting activity:
- Temperature too low: Try moving to a warmer spot (75-80°F/24-27°C is ideal)
- Water quality: Switch to filtered water if using tap water
- Flour type: Add a tablespoon of whole wheat flour to boost activity
- Time: Some starters simply need more time to develop
- Feeding ratio: you can try adjusting to feed equal amounts of flour and water by weight
What is this dark liquid (hooch) on top?
This gray-ish liquid is alcohol—a byproduct of fermentation and it is a sign your starter is hungry. It’s completely normal, especially when your starter has gone a while between feedings.
You can either:
- Pour it off for a milder flavor
- Stir it in for a more tangy result
Then proceed with feeding as usual.
My starter smells like nail polish remover/gym socks/vomit. Is it bad?
Strong, unpleasant smells are common during the early stages as different bacteria come and go. The smell should improve with consistent feeding.
Normal “bad” smells: Vinegar, acetone (nail polish), cheese, yogurt, feet Truly bad smells: Putrid, rotten, or moldy odors
If the smell doesn’t improve after 2-3 feedings, consider starting fresh.
Help! I see mold (Pink, Orange, Fuzzy)!
Mold (especially pink, orange, or any fuzzy growth) is the one situation where you should discard your starter completely and begin again.
To prevent mold:
- Use clean utensils and jars
- Ensure proper covering
- Maintain regular feedings
- Consider adding a tablespoon of apple cider vinegar to your mix when starting over (creates an acidic environment less hospitable to mold)
My starter was active, but now it’s sluggish.
Revive a sluggish starter with these tips:
- Temperature check: Move to a warmer location
- Flour boost: Add a tablespoon of whole grain flour to your next feeding
- Increase feeding frequency: Try feeding twice daily for a few days
- Adjust ratio: Reduce the amount of starter you keep before feeding (try 1:3:3 or even 1:5:5)
Can I use different types of flour?
Absolutely! Once your starter is stable, you can experiment with various flours:
- Whole wheat: Creates a more active, earthy starter
- Rye: Often produces the most active fermentation
- Bread flour: Higher protein content helps with rise
- Ancient grains: Spelt, einkorn, and emmer add interesting flavors
You can gradually shift your starter to a new flour by incorporating a little more with each feeding.
I missed a feeding! Is it dead?
Sourdough starters are remarkably resilient! Even after days (or sometimes weeks) of neglect, they can often be revived:
- Remove any dried crust or discolored portions
- Feed with equal weights of flour and water
- Feed again after 24 hours
- Resume regular feeding schedule once activity returns
Ready to Bake! Using Your New Sourdough Starter
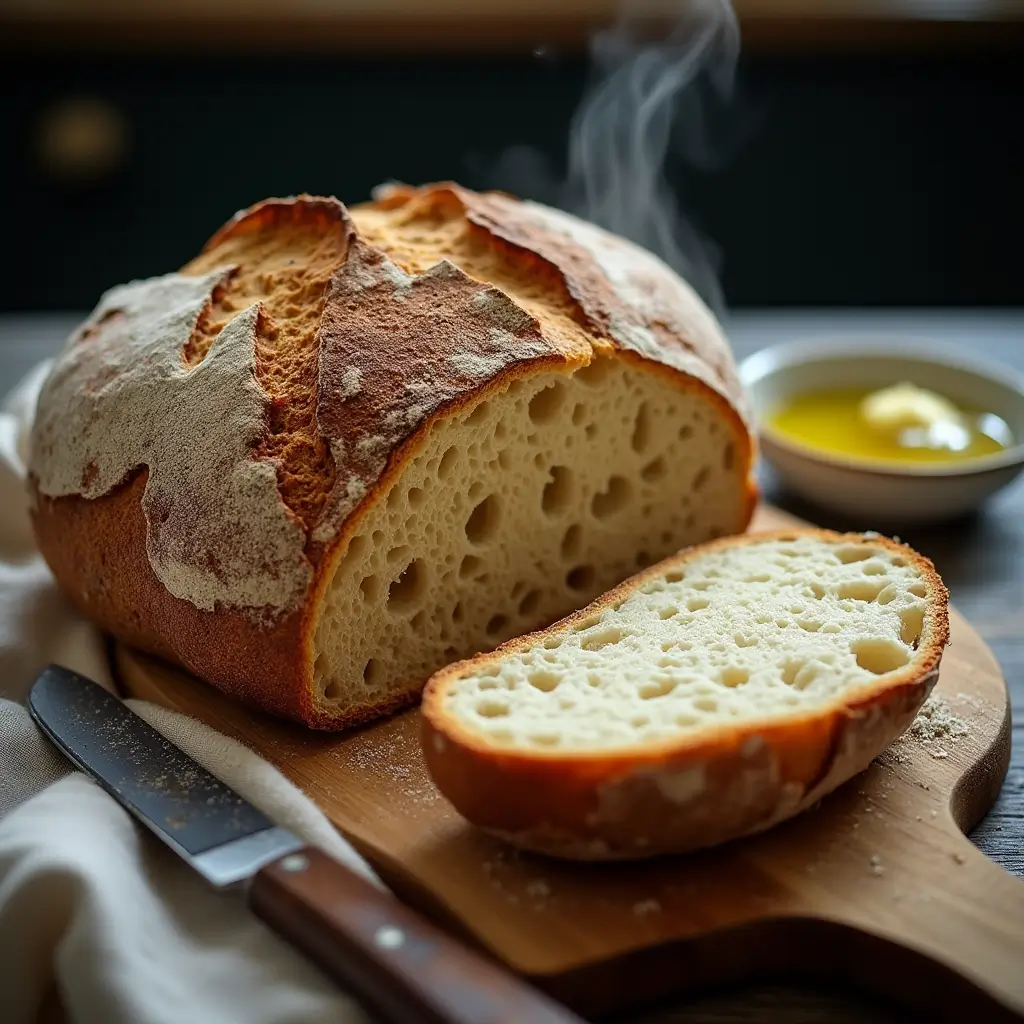
Congratulations on creating your very own sourdough starter from scratch! Now it’s time to put it to use.
For best results, use your starter when it’s at “peak” activity—typically 4-8 hours after feeding when it has roughly doubled in size and is full of bubbles. This is when the yeast population is most vigorous and will provide the best rise.
For beginners, I recommend starting with simpler recipes before tackling a full sourdough loaf:
- Sourdough pancakes or waffles (perfect for using discard)
- Sourdough focaccia (flat and forgiving)
- Sourdough English muffins
Remember that your first bakes might not be perfect—sourdough baking is a journey of continuous learning and adjustment. Each loaf teaches you something new about your starter and technique.
Glossary of Sourdough Terms
| Term | Definition |
|---|---|
| Levain | A portion of active starter built specifically for a recipe, often with adjusted hydration or flour types |
| Peak | The point of maximum fermentation activity, when starter has roughly doubled and is full of bubbles |
| Discard | Portion of starter removed during feeding, usable in many recipes |
| Hydration | The ratio of water to flour by weight (100% hydration means equal weights) |
| Fermentation | The process by which yeast and bacteria consume carbohydrates, producing CO2 and acids |
| Wild Yeast | Naturally occurring yeast strains (as opposed to commercial baker’s yeast) |
| Hooch | The grayish liquid (alcohol) that sometimes forms on top of hungry starter |
Final Thoughts: Your Sourdough Journey Begins
Creating and maintaining a sourdough starter is truly one of the most rewarding kitchen projects you can undertake. What begins as a simple mixture of flour and water transforms, through patience and care, into a living culture that can provide you with delicious bread for years—even decades—to come.
Remember these key takeaways:
- Patience is essential—nature works on its own schedule
- Observation helps you understand your unique starter
- Consistency in feeding leads to a stable culture
- Don’t fear the funk—strange smells during development are usually normal
Most importantly, enjoy the process! There’s something profoundly satisfying about creating bread using the same natural fermentation methods that humans have employed for thousands of years.
Have questions about your starter? Ask in the comments below – I’m happy to help!
Ready to take the next step? Check out my [Beginner’s Sourdough Bread Recipe] or explore creative ways to use your [Sourdough Discard].
Happy baking!